
If you’ve spent much time on GitHub, you’ve probably come across repositories with green badges that look like this:
A lot of repositories will have these badges/shields, as they indicate that the last run of the Continuous Integration (CI) pipeline for this repository “passed” (e.g. everything is working as expected).
Now, Continuous Integration can mean a lot of things: maybe the project has a wealth of well-written tests that are all passing, or the simply that coding standards are all up-to-par. No matter the coverage level, this green badge indicates to potential users of your code that it satisfies the quality checks you’ve put in place.
Better yet, once we have a Continuous Integration pipeline in place, we can make it a prerequisite for pull requests to be merged. If you’re tired of PRs that don’t respect your project’s coding standards, ignore PHP compatibility rules, or otherwise produce lots of overhead, automating the high-level testing can save you lots of time.
Initial configuration of Travis CI
There are a number of great Continuous Integration services out there, but Travis CI (or commonly just “Travis”) has long been a popular choice. Travis CI makes GitHub integration really simple, and offers its services for free to open-source projects.
 The first step to getting set up with Travis CI is to connect your GitHub account; this will authorize Travis to read your repositories and watch them for changes.
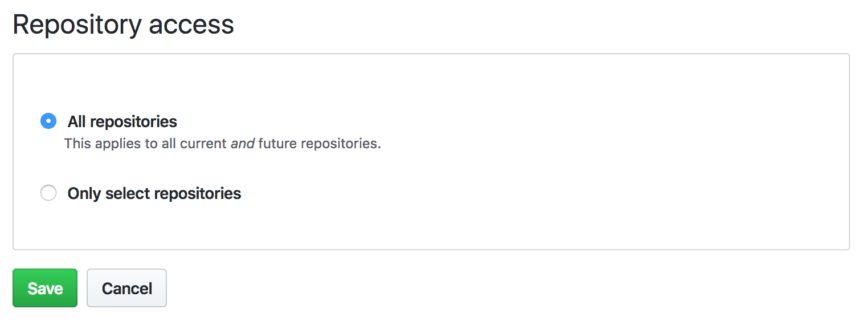
As you connect your GitHub account, you’ll be given the option to either enable Travis CI by default for repositories or only those you select; the choice is up to you, but Travis shouldn’t run anything without being given a .travis.yml file (more on this in a second), so it’s generally safe to enable it across the board.
Configuring your project: the .travis.yml file
Travis CI is configured via the .travis.yml file, which uses YAML syntax to define what the environment should look like and what should be run.
A typical .travis.yml file for a PHP library might look like this:
|
1 2 3 4 5 6 7 8 9 10 11 12 13 14 15 16 17 18 19 |
language: php services: - mysql cache: directories: - $HOME/.composer/cache php: - 7.4snapshot - 7.3 - 7.2 install: - composer install --prefer-dist --no-interaction script: - ./vendor/bin/phpunit |
In order, we’re telling Travis CI:
language:We’re using PHPservices:We want to make MySQL available to our Travis CI environmentcache:We want to cache the~/.composer/cachedirectory between builds (this will speed things up)php:We want to test against PHP 7.4, 7.3, and 7.2 (e.g. the currently-supported versions of PHP at the time of this writing)install:As we’re installing dependencies within the environment, we want to runcomposer installscript:when we run the actual test script, we want to run PHPUnit from the version that was installed via Composer
There are a whole host of other things we can configure, but I’ll walk you through the configuration for a typical WordPress plugin.
Configuring Travis CI for WordPress Plugins
When we’re configuring Travis CI to test our WordPress plugins, there are typically a few questions we need to ask:
- What are we trying to test? This might be running unit tests, checking coding standards, performing static code analysis, etc.
- In Travis CI, this would make up the
scriptportion of our configuration
- In Travis CI, this would make up the
- What environments are we concerned with? Are we testing against certain versions of WordPress? Specific versions of PHP? What do we need to do to build out the environment we want to test in?
The general idea of Continuous Integration is to take all of the automated tests you might run locally, and instead run them in a sandboxed, cloud environment. By scripting the testing process out, it’s highly reproducible and can be run automatically each and every time code is pushed, a PR is opened, etc.
Understanding the Build Matrix
One of the most useful cases for using Travis CI with WordPress plugins is the ability to test combinations of PHP and WordPress versions.
For instance, imagine you need to support all the way back to WordPress 4.9 and PHP 5.6 (for the record, if you’re using either of those please upgrade immediately). Travis CI has the concept of a “build matrix”, which is a list of each combination of factors it needs to run.
Testing back to PHP 5.6 means we’ll have six PHP versions (5.6, 7.0, 7.1, 7.2, 7.3, and 7.4). If we use major WordPress releases, we’ll have five versions of WordPress (4.9, 5.0, 5.1, 5.2, and 5.3). That would be represented by a 6×5 matrix, which means we’d need to run 30 jobs to capture all of the combinations of supported PHP and WordPress versions!
|
1 2 3 4 5 6 7 8 9 10 11 12 13 14 15 16 |
# Six versions of PHP... php: - 7.4snapshot - 7.3 - 7.2 - 7.1 - 7.0 - 5.6 # ...times five versions of WordPress env: - WP_VERSION=5.3 - WP_VERSION=5.2 - WP_VERSION=5.1 - WP_VERSION=5.0 - WP_VERSION=4.9 |
Keep in mind that Travis CI provides its services for free for open-source work, but that doesn’t mean it’s cool to throw 30 jobs at it every time you upgrade a README file; let’s look at how we might trim down the matrix:
Reducing the number of builds
Travis CI makes it really easy to inflate the number of jobs, but we can just as easily exclude combinations of jobs.
Under the matrix node, we explicitly include and/or exclude certain jobs from the build matrix. Since WordPress 4.9 doesn’t support PHP 7.3, for example, it’s not really worth testing that combination:
|
1 2 3 4 5 6 |
matrix: exclude: - php: 7.4snapshot env: WP_VERSION=4.9 - php: 7.3 env: WP_VERSION=4.9 |
This helps shave two builds off the matrix, but we can probably do more, right?
Tip: Implicit/Canary Testing for Legacy Versions
One trick I’ve found is the idea of implicitly testing versions we don’t really care about.
Let’s say we have a plugin where most of the installations are using the latest version of WordPress and a modern version of PHP, but there are still a few hold-outs running it on older versions of WordPress and/or PHP.
I’m might not lose sleep over my plugin breaking on sites that are running older setups, but it would be good to know if, for example, I’m pushing a change that could cause the installs running PHP 5.6 to white-screen.
I might leave PHP 5.6 and older versions of WordPress out of my php: and env: configurations, and instead create an explicit job like this:
|
1 2 3 4 5 |
matrix: include: - name: Legacy Installations php: 5.6 env: WP_VERSION=4.9 |
Now Travis CI will have a job named “Legacy Installations” that tests my code on PHP 5.6 with WordPress 4.9. The idea is that I’m explicitly testing the combinations that are actively supported, while this build acts as a “canary in the coal mine” of sorts; if everything’s working on the current setup and still working with the oldest supported configuration, we can infer that it’s probably working fine for everything else in-between.
Granted, we might not want to take that chance with mission critical code, but if I can cut my build matrix (and thus build time) down by ~75% for a free plugin, that’s worth it in my mind.
Testing the Bleeding Edge
It’s often nice to be able to test your plugin against the latest and greatest, be it WordPress or PHP. As a plugin developer and maintainer, it’s beneficial to know “hey, my plugin is having issues with WordPress trunk” so I can address the problems ahead of the next release.
Using the build matrix we’ve already discussed, we can add jobs designed to test nightly versions of both WordPress and PHP:
|
1 2 3 4 5 6 7 |
matrix: include: - name: Bleeding Edge php: nightly env: WP_VERSION=trunk allow_failures: - php: nightly |
This creates a new job named “Bleeding Edge” that uses WordPress Trunk and the nightly build of PHP (at the time of this writing, development builds of PHP 8.0).
The next part, allow_failures:, lets us flag jobs that are permitted to fail without breaking the build. Since the “Bleeding Edge” job is running against software that isn’t necessarily stable, it’s usually best to let it fail without consequence; once again, we’re putting a canary into our (metaphorical) coal mine.
Improving Travis CI performance
There are a few tricks that can help speed up your Travis CI builds:
First, take advantage of the matrix.fast_finish directive. If you have jobs that are allowed to fail (for example, Bleeding Edge builds), adding this directive lets Travis CI decide “well, everything that’s required to pass has done so, so we can consider this build a success.” This will help speed up the feedback loop from the time code is pushed to the time you know everything’s good.
|
1 2 |
matrix: fast_finish: true |
We can also speed up our builds by disabling XDebug in jobs where it’s not needed. XDebug is a fantastic tool, but unless you’re doing deep introspection or generating code coverage, running PHP with XDebug enabled can slow everything down.
|
1 2 3 |
before_install: # Unless we need XDebug, disable it for improved performance. - phpenv config-rm xdebug.ini || return 0 |
How do I get one of those green badges on my project?
Now that you have an understanding of what it all means, here’s a well-commented, sample .travis.yml file you can drop into your existing plugin:
|
1 2 3 4 5 6 7 8 9 10 11 12 13 14 15 16 17 18 19 20 21 22 23 24 25 26 27 28 29 30 31 32 33 34 35 36 37 38 39 40 41 42 43 44 45 46 47 48 49 50 51 52 53 54 55 56 57 58 59 60 61 62 63 64 65 66 67 68 69 70 71 72 73 74 75 76 77 78 79 |
language: php services: - mysql cache: directories: - $HOME/.composer/cache # Explicitly test against supported versions of PHP # # Reference: https://www.php.net/supported-versions.php php: - 7.4snapshot - 7.3 - 7.2 # Test against the latest version of WordPress and one version back. env: - WP_VERSION=latest - WP_VERSION=5.2 # Customize the build matrix. matrix: fast_finish: true include: # Run PHP_CodeSniffer - name: Coding standards php: 7.3 env: WP_VERSION=latest WP_TRAVISCI=phpcs # Canary for our oldest-supported version - name: Legacy php: 5.6 env: WP_VERSION=4.9 # Nightly versions of PHP and WordPress. - name: Bleeding edge php: 7.4snapshot env: WP_VERSION=trunk # Jobs that are permitted to fail without breaking the build allow_failures: - name: Bleeding edge before_install: - export PATH="$HOME/.composer/vendor/bin:$PATH" # Unless we need XDebug, disable it for improved performance. - phpenv config-rm xdebug.ini || return 0 install: # Install our Composer dependencies - composer install --prefer-dist --no-interaction # Install an older version of PHPUnit if we're still running PHP 5.6. - | if [[ "$TRAVIS_PHP_VERSION" == "5.6" ]]; then wget -O ./vendor/bin/phpunit https://phar.phpunit.de/phpunit-5.phar chmod +x ./vendor/bin/phpunit fi # Install the WordPress core test suite - bash bin/install-wp-tests.sh wordpress_test root '' localhost $WP_VERSION script: - | # If we've set the $WP_TRAVISCI variable to run PHPCS, do that instead # of running PHPUnit. if [[ "$WP_TRAVISCI" == "phpcs" ]]; then ./vendor/bin/phpcs else # Execute the test suite ./vendor/bin/phpunit # Optionally run the tests again in a multisite environment #WP_MULTISITE=1 ./vendor/bin/phpunit fi |
This configuration assumes a few things, and may need adjustment if any of the following are not met:
- You are planning to test against currently-supported versions of PHP and the latest and previous major releases of WordPress, with a canary build going back to WordPress 4.9 and PHP 5.6.
- You have scaffolded the WordPress core test suite by running
wp scaffold plugin-tests, and the resultinginstall-wp-tests.shscript lives in thebin/directory of your project. - Your plugin contains a
composer.jsonfile, which includes the following:
123456{"require-dev": {"phpunit/phpunit": "^7.5","squizlabs/php_codesniffer": "3.*"}}
Reminder: the WordPress Core Test Suite doesn’t yet support PHPUnit 8!
With all of these items in place, we can push our plugin source to GitHub and Travis CI should start working through the build matrix pretty quickly.
Once Travis has registered that we want to use the service to build our project, we should be able to click the green badge on the Travis build page (typically https://travis-ci.com/{username}/{repository-name}) and select the type of image markup we want: a plain image URL, Markdown, Textile, or several other formats.
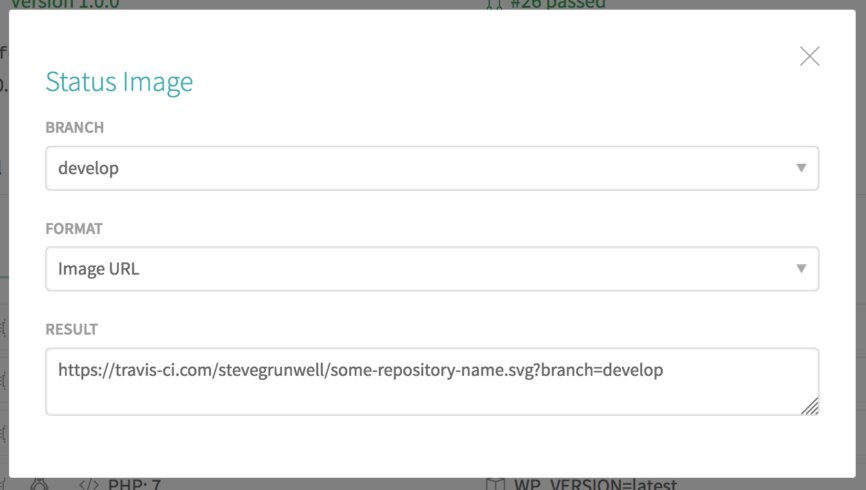
Take this image and display it proudly in your README, on your marketing site, or anywhere else you need it. Since the badge itself is served from Travis CI, the image file itself will update to reflect the latest build status!
Looking to do even more with Travis CI? I found this article by Tomas Votruba to be really helpful when fleshing out this post.


Luke Cavanagh
Example composer.json for Travis CI testing would be handy along with an example test.