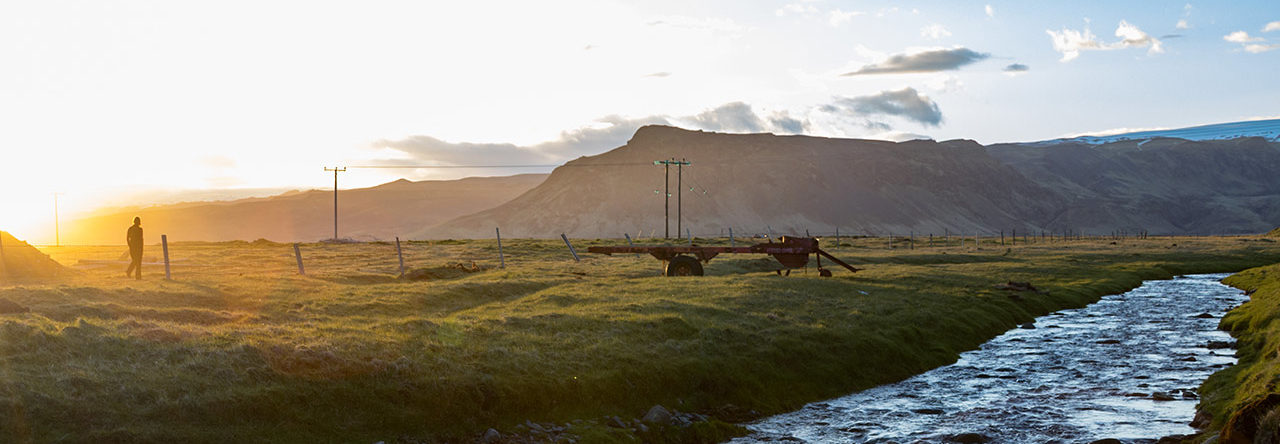
Since starting to work from home in the fall, my personal coffee expenses have risen; not only am I drinking coffee at home seven days a week, but I no longer have the excuse of “well, the office coffee isn’t the best, but at least it’s free.”
Columbus has some fantastic local roasters–Café Brioso, Stauf’s, and One Line Coffee, to name a few–but most of the best shops are located closer to downtown, making it rather inconvenient for a suburb-dweller such as myself. There are a few places closer to home where I can purchase the beans, but there’s a limited selection and no guarantee on freshness. Meanwhile, my local grocery store’s offerings are run-of-the-mill macro-roasts (Folgers, Maxwell House, Starbucks, etc.).
Inspired partly by a Twitter conversation with Joel Worsham and by Matt Haynes, my mentor in all things caffeinated, I decided to give roasting coffee at home a try.
https://twitter.com/JoelWorsham/status/560446607221866498
The equipment
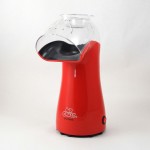 Following Matt’s lead, I headed straight to Sweet Maria’s Home Coffee Roasting, his main source for green coffee and supplies. Not wanting to invest a ton on equipment, I took Sweet Maria’s suggestion and started with the West Bend Air Crazy (yes, a popcorn maker), their recommended air roaster for beginners. Despite the fact that using the Air Crazy for anything other than popcorn will void its warranty, at $30 ($40 when I purchased it a few weeks prior to writing this post), it’s hard not to at least give it a try.
Ordering the Air Crazy from Sweet Maria’s also gave me a discount on their coffee sampler packs: Four one-pound bags of green coffee beans from various origins for just $10 (normally $20). That meant that for $50 (again, prices have since dropped) I was able to get four pounds of coffee and the equipment to roast it for what I’d pay for 3-4 pounds of locally-roasted coffee. I also picked up a roast log (remember: the difference between science and messing around is writing it down!) and a sleek-looking storage tin (I’m a sucker for brushed-metal).

Seriously, this is totally worth it.
Once I use up the green coffee (which can be stored without any adverse effects on flavor for 6 months to a year while un-roasted), I can easily order more beans through Sweet Maria’s or elsewhere online. Many local roasters will also sell you green coffee at a discount (if I recall correctly, Matt saved 20% when he purchased green coffee at One Line Coffee), so there are local options for sourcing beans as well.
The roasting process
When roasting, the only equipment I’ve required beyond my Air Crazy is a bowl to catch chaff (the thin, flaky remnant of the exterior of the coffee bean), a cookie sheet (I’ve heard that coffee roasting can tarnish equipment, so I use an older one we won’t miss if it becomes dedicated to coffee) and put down wax paper (the beans will let off some oils as they cool). I also keep a cheap wooden spoon handy to spread out the beans on the cookie sheet for cooling, but that may not be totally necessary.
If you’ve used an air-popper for popcorn before, the process should seem pretty familiar. Start the popper, add some green coffee (I’ve been doing 1/2 cup batches, which is good for 2-3 days of coffee), and listen for it to be done. The only difference between roasting coffee and popping popcorn is instead of the popper throwing out hot, delicious popcorn, your bowl will be filled with chaff. Once the coffee is roasted to your satisfaction, spread the freshly roasted coffee out on your cookie sheet to cool.
I’d prefer not to stink up the house or set off any smoke detectors, so I roast on my stove-top under my vent fan, though I’ve heard an open window can be just effective. Roasting hasn’t produced a ton of smoke for me at this point, but I’ve also been erring on the lighter side of the roast spectrum until I get bold enough to do more of a darker roast.
The eight stages of roasting
Since I’m already tooting the Sweet Maria’s horn (disclosure: I’m in no way affiliated with Sweet Maria’s other than being a fan of their products and resources), here’s their general outline of the roasting process:
- Yellowing: For the first few minutes the bean remains greenish, then turn lighter yellowish and emit a grassy smell.
- Steam: The beans start to steam as their internal water content dissipates.
- First Crack: The steam becomes fragrant. Soon you will hear the “first crack,” an audible cracking sound as the real roasting starts to occur: sugars begin to caramelize, bound-up water escapes, the structure of the bean breaks down and oils migrate from their little pockets outward.
- First Roasted Stage: After the first crack, the roast can be considered complete any time according to your taste. The cracking is an audible cue, and, along with sight and smell, tells you what stage the roast is at. This is what is call a City roast.
- Caramelization: Caramelization continues, oils migrate, and the bean expands in size as the roast becomes dark. As the roast progresses, this is a City + roast. Most of our roast recommendations stop at this point. When you are the verge of second crack, that is a Full City roast.
- Second Crack: At this point a “second crack” can be heard, often more volatile than the first. The roast character starts to eclipse the origin character of the beans at this point and is also known as a Vienna roast. A few pops into second crack is a Full City + roast. Roasting all the way through second crack may result in small pieces of bean being blown away like shrapnel!
- Darkening Roast: As the roast becomes very dark, the smoke is more pungent as sugars burn completely, and the bean structure breaks down more and more. As the end of second crack approaches you will achieve a French roast.
- Ack!! Too Late! Eventually, the sugars burn completely, and the roast will only result in thin-bodied cup of “charcoal water.”
Of the two times I’ve roasted (so far), I’ve produced a really good City Roast using Ethiopia Kaffa beans and a Full City with the Brazilian Carmo de Minas. Both of those beans were in my sampler pack, and I still have a pound each of Rwandan and Sumatran beans I haven’t even opened yet.
The results
I’m fully aware that I’m far from a master roaster, but both batches of coffee so far have been among the best I’ve ever had, rivaling cups from some of the top local roasters. Freshly-roasted beans bloom beautifully with pourovers (related: learn the science of the perfect pourover), smell fantastic, and you can actually detect the flavor profile change over the first few days.
http://instagram.com/p/y8UW0kP1fM/
For such a small investment, I have the means and supplies to enjoy delicious, fresh-roasted coffee for months to come. I can’t recommend home roasting enough to coffee enthusiasts, and I’m looking forward to trying new coffees from around the world!


Joel
Man, this is thorough! Thanks for writing this. I’m really excited to get started myself, and I feel more than competent after reading this.
Go coffee!
Aaron
Thank you for sharing your experience! At-home roasting can be super rewarding once you get the hang of it. Your detailed list of the 8 stages of roasting is very helpful to understand where to stop to produce the optimal roast based on your preference.