With our daughter due in less than a month, there’s a whole list of things we’ve been doing around the house to get ready for her arrival. I’ve had and idea kicking around in my head for the last few months, and this morning I finally implemented it: installing an on/off switch on our doorbell.
It’s a simple idea, really: you put the baby down (and hopefully yourself) for a nap, and without fail someone rings your bell, hoping to sell you cable, windows, or landscaping services. With the 2016 election season just around the corner the last thing I want is my baby’s sleep to be interrupted by someone trying to sell me on their political candidates.
Before diving into the “I’m going to do this myself” mindset, I checked Amazon and my local hardware stores to see if such a thing existed. I figured that surely in this age of smart homes someone would be marketing such a feature (the obvious next step would be a digital doorbell on a schedule and/or with the ability to toggle its sound from a mobile app), but aside from a few hobbyists on YouTube my search came up empty.
When designing the solution, I had a few goals:
- I wanted the switch to be discreet, yet accessible without opening up the case
- The switch should be labeled so a quick glance could tell me if the doorbell was active or not
- Ideally there wouldn’t be any illumination on the switch, as that seemed contrary to goal #1
- The project should cost < $10 (admittedly that was more driven by my wife)
Provisioning
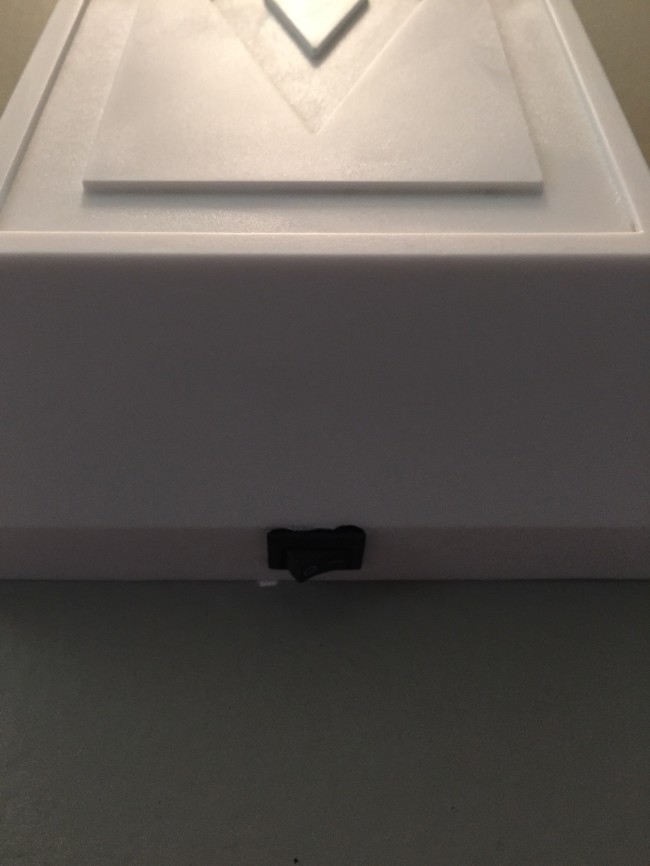
I set out to Amazon to acquire my parts. After checking out a number of different options, I settled on this five pack of mini boat rocker switches for a whopping $5. The switch is labeled, non-illuminated, and is small enough to fit on the bottom edge of our doorbell cover where it’s accessible yet barely noticeable.
I started to shop for some bell wire, until my dad offered up some scrap speaker wire he had lying around instead; pretty much any low-voltage wire should work, as common wired doorbells’ transformers typically reduce the voltage to around 10-20 volts. Of course, you should always shut off electricity to the affected areas of your house when messing with wiring.
Installing the switch
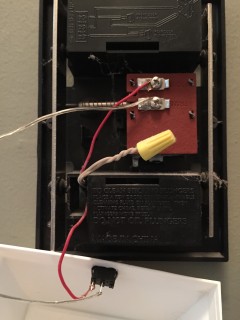
I began by removing the cover of the doorbell and temporarily wiring the switch into the circuit. When the switch was in the “on” position, the doorbell worked as expected and while in the “off” pressing the button on our porch produced no sound. As an added bonus, the backlight on the porch button also went out, a nice visual cue that maybe solicitors shouldn’t be ringing our bell.
After testing out the temporary positioning, I took the plastic doorbell cover out into the garage and measured out the position of the switch on the bottom edge of the case. I was able to cut out this hole pretty easily using my Dremel, and position the switch in the hole (the switches I linked to above have little plastic tabs to help hold the switch in place, so I didn’t have to use any sort of adhesive).
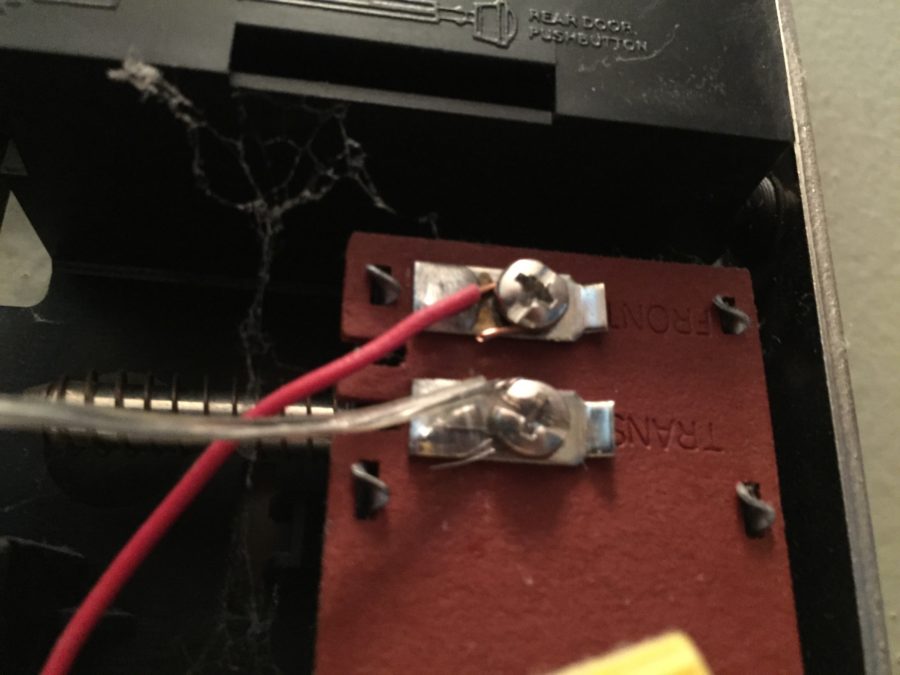
 Wiring up the switch was just the same as when I did my test, but now instead of both red wires screwing into the transformer terminals one went into one end of the switch, with the speaker wire connecting the other end of the switch to the second terminal.
It wasn’t until I was putting everything back together that I realized an issue with my positioning: the black frame that the transformer + bell is mounted to is meant to lie flush against all four edges of the white plastic cover. With the switch in place, the bottom of the cover wouldn’t close tightly around the frame. Fortunately, I was able to notch out a little space in the frame using my Dremel, and now everything fits together tightly.

All-in-all, cutting the hole took the most time, but the whole project took less than 20 minutes to complete. Now we have a simple switch we can flip to turn off our doorbell and let our baby (and ourselves) get some sleep.
Doorbells can actually be pretty cool!
Admittedly, this project has kind of inspired me. As I said before, it’s a simple concept but there’s a lot that could be done to reinvent doorbells:
- Notifications on phones/smart-whatevers instead of a dog-maddening doorbell sound
- Scheduled “Do Not Disturb” hours
- Pairing a doorbell with a retina scanner to automatically order Thin Mints from neighborhood Girl Scouts and politely (or not) tell other solicitors to hit the curb
If anyone has other ideas for awesome doorbell features, I’d love to talk them over with you!


TronicJon
Do you think it’s possible to disable the doorbell chime via switch without losing power to my Ring smart doorbell? You mentioned the light went out so that’s mot good for me.
Steve
Not without getting more involved — this approach basically adds a master kill switch to power on that [low-voltage] line, so it would cut power to Ring.
It seems odd that Ring doesn’t have a “disable the chime” feature 🤔
Mario
I came here today after a postman woke me up at 7am.
I was wondering whether in this day and age it would be possible to somehow upgrade my intercom to something more smart (i.e. where I can program the hours when it’s on).
many thanks
ellisonwilliams
Great guide on installing a doorbell switch! Your step-by-step instructions and tips made the process so much easier. I appreciate the clear visuals and helpful explanations—definitely going to try this at home